La struttura chimica dei carboidrati

Scopri la struttura chimica dei carboidrati, dai monosaccaridi ai polisaccaridi. Analisi approfondita dei benefici nutrizionali e del ruolo nella dieta moderna.
Kefir al latte di cocco
La nostra ricetta Kefir al latte di cocco ha una piccola quantità di zucchero per aiutare a fermentare il latte di cocco in kefir, ma è un'ottima opzione per coloro che seguono una dieta keto modificata. Usalo come liquido in un cereale a base di cocco composto da scaglie di cocco non zuccherato, noci tritate e una piccola manciata di bacche fresche. Le bacche forniranno una piccola quantità di carboidrati, ma aiuteranno a bilanciare il pasto e a dargli una consistenza più soddisfacente.
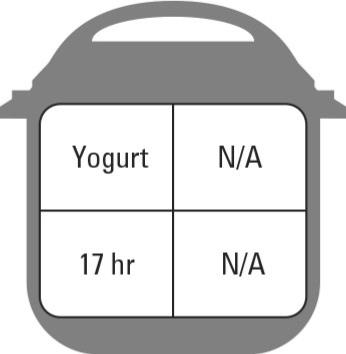
Funzione Pentola Istantanea: Yogurt
Strumenti speciali: termometro a lettura istantanea, barattoli di vetro per la conservazione
Adatto a diete: Senza Glutine, Keto, Vegana, Vegetariana
Tempo di preparazione: 5 minuti
Tempo di cottura: 17 ore
Resa: 9 porzioni
ingredienti
Due lattine da 13,5 once di crema di cocco non zuccherata
2 cucchiai di yogurt al cocco con fermenti lattici vivi o 1 capsula (svuotata) di polvere probiotica
2 cucchiai di sciroppo d'acero
2 cucchiaini di gelatina non aromatizzata
Indicazioni
Aggiungi la crema di cocco alla pentola istantanea, chiudi il coperchio e premi due volte l'impostazione Yogurt , finché sullo schermo non viene visualizzato Bollire. Fissare il coperchio.
Quando Instant Pot emette un segnale acustico, rimuovere il coperchio e controllare la temperatura; dovrebbe leggere almeno 180 gradi. In caso contrario, impostalo su Sauté e continua a riscaldare fino a raggiungere i 180 gradi.
Nel lavello della tua cucina, fai un bagno di ghiaccio che si adatti alla tua pentola. Metti la pentola nel bagno di ghiaccio. Mescolare costantemente fino a quando il latte raggiunge l'intervallo di temperatura compreso tra 105 e 110 gradi. Quindi incorporare lo yogurt al cocco o la polvere probiotica, lo sciroppo d'acero e la gelatina. Continuare a sbattere per 1 minuto.
Asciuga il fondo della pentola. Rimettilo nella pentola istantanea e chiudi il coperchio.
Premere l' impostazione Yogurt , impostare l'ora su 16 ore e premere Start.
Quando il kefir è completo, aggiungi acqua bollente nei barattoli di conservazione. Lasciare riposare per 5 minuti, quindi scaricare l'acqua e lasciare asciugare i barattoli all'aria. Versa il kefir nei barattoli, chiudi i coperchi e conserva in frigorifero fino a 10 giorni o in congelatore fino a 1 mese.
Più a lungo fai fermentare il kefir, più è probabile che raggiunga una consistenza sottile, simile allo yogurt.
Evita di usare il miele come dolcificante. I batteri nel miele competeranno con i probiotici.
Unisci le bacche fresche dopo che il kefir è completo e conserva fino a 3 giorni. Se preferisci un prodotto più denso prova a sbattere 1 cucchiaino di farina di tapioca prima di metterlo in frigorifero.
Uova in camicia
Se sei un fan delle uova, potrai comunque gustarle con la dieta chetogenica! Le uova sono una scelta ricca di nutrienti che si abbina perfettamente ad alcune delle verdure a basso contenuto di carboidrati, come broccoli, spinaci e funghi tritati! Puoi anche aggiungere del formaggio cheddar e della carne tritata per un pasto più proteico. La nostra ricetta delle uova in camicia è un ottimo punto di partenza.
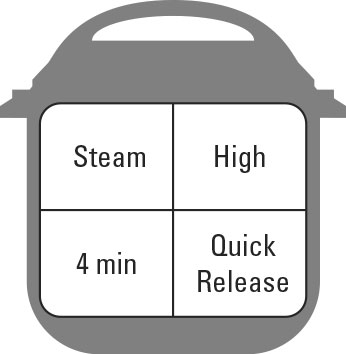
Funzione pentola istantanea: vapore (alto), rilascio rapido
Strumenti speciali: pirottini per muffin in silicone
Adatto a diete: Senza Glutine, Keto, Mediterranea, Vegetariana
Tempo di preparazione: nessuno
Tempo di cottura: 4 minuti
Resa: 4 porzioni
ingredienti
4 uova grandi
1 tazza d'acqua
Indicazioni
Spruzzare 4 pirottini per muffin in silicone con uno spray da cucina e rompere 1 uovo in ciascun portabicchieri per muffin.
Metti i pirottini per muffin sul sottopentola. Versare l'acqua nella pentola e abbassare delicatamente il sottopentola nella pentola. Fissare il coperchio e impostare su Vapore (alto). Imposta il tempo su 4 minuti.
Al termine della cottura, premere Annulla e Rilascio rapido per sfiatare.
Usando un cucchiaio, raccogli con cura le uova dal rivestimento.
Per un tuorlo d'uovo più sodo, aumentare il tempo di cottura a 5 minuti. Per un uovo in camicia più morbido, ridurre il tempo di cottura a 3 minuti.
Brodo di ossa di manzo
Avoid paying the high price for a glorified bone broth at your local market, and make your own in your Instant Pot. Our Beef Bone Broth recipe is an excellent way to bring rich flavor to the low-carbohydrate soups that tend to be prominent on the keto diet. Plus, bone broth is a great source for many vitamins and minerals because of the bone used to flavor the broth.
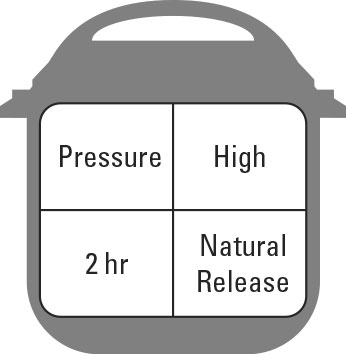
Instant Pot function: Pressure Cook (High), Keep Warm (On), Natural Release
Special tools: Glass storage jars
Fits diets: Gluten-Free, Keto, Mediterranean
Prep time: None
Cook time: 2 hours
Yield: 10 servings
Ingredients
3 pounds beef bones
3 large carrots, chopped
3 celery stalks, chopped
1 large onion, chopped
1/2 teaspoon dried thyme
1/4 cup parsley
1 bay leaf
1/4 teaspoon peppercorns
2-1/2 quarts filtered water
Directions
Combine the bones, carrots, celery, onion, thyme, parsley, bay leaf, and peppercorns in the Instant Pot; then pour the filtered water over the top.
Secure the lid and set to Pressure Cook (High) and Keep Warm (On) or use the Soup/Broth setting. Set the time for 120 minutes using the +/– button and press Start.
When cooking completes, do a Natural Release of the pressure for 30 minutes.
Carefully remove the pot from the Instant Pot with oven mitts. Strain the stock with a colander into a clean bowl, and discard the bones and vegetables. Store in the refrigerator up to 5 days or in the freezer up to 4 months.
You can use onion skins, celery stems, and the tops of celery in stock.
To make a rich and robust beef stock roast the bones in the oven for an hour at 400 degrees.
Beef Bone Broth
Avoid paying the high price for a glorified bone broth at your local market, and make your own in your Instant Pot. Our Beef Bone Broth recipe is an excellent way to bring rich flavor to the low-carbohydrate soups that tend to be prominent on the keto diet. Plus, bone broth is a great source for many vitamins and minerals because of the bone used to flavor the broth.
Instant Pot function: Pressure Cook (High), Keep Warm (On), Natural Release
Special tools: Glass storage jars
Fits diets: Gluten-Free, Keto, Mediterranean
Prep time: None
Cook time: 2 hours
Yield: 10 servings
Ingredients
3 pounds beef bones
3 large carrots, chopped
3 celery stalks, chopped
1 large onion, chopped
1/2 teaspoon dried thyme
1/4 cup parsley
1 bay leaf
1/4 teaspoon peppercorns
2-1/2 quarts filtered water
Directions
Combine the bones, carrots, celery, onion, thyme, parsley, bay leaf, and peppercorns in the Instant Pot; then pour the filtered water over the top.
Secure the lid and set to Pressure Cook (High) and Keep Warm (On) or use the Soup/Broth setting. Set the time for 120 minutes using the +/– button and press Start.
When cooking completes, do a Natural Release of the pressure for 30 minutes.
Carefully remove the pot from the Instant Pot with oven mitts. Strain the stock with a colander into a clean bowl, and discard the bones and vegetables. Store in the refrigerator up to 5 days or in the freezer up to 4 months.
You can use onion skins, celery stems, and the tops of celery in stock.
To make a rich and robust beef stock roast the bones in the oven for an hour at 400 degrees.
Seasoned Pulled Pork
Our Seasoned Pulled Pork recipe is very rich, mainly from the fattier pork shoulder used in the recipe. The recipe suggests pairing this with a simple coleslaw, which traditionally is high in fat from mayonnaise. But if you’re on the keto diet, we recommend pairing this recipe with low-carbohydrate veggies to add more fiber to your diet and prevent some of the unfortunate side effects of a high-fat diet, like constipation.
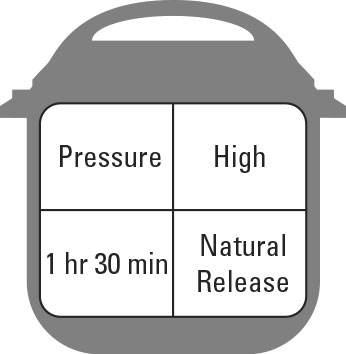
Instant Pot function: Pressure Cook (Normal), Keep Warm (Off), Natural Release
Special tools: Meat thermometer
Fits diets: Gluten Free, Keto
Prep time: 5 minutes
Cook time: 1-1/2 hours
Yield: 12 servings
Ingredients
2 tablespoons blackened seasoning
2 teaspoons garlic powder
1 teaspoon onion powder
1 teaspoon paprika
1/2 teaspoon ground black pepper
1/4 teaspoon salt
4 pounds bone-in pork shoulder
2 cups chicken broth
1 bay leaf
Directions
In a large bowl, mix together the blackened seasoning, garlic powder, onion powder, black pepper, and salt. Add the pork shoulder, and rub the spices into the pork shoulder, covering the entire surface area.
Place the seasoned pork shoulder into the inner pot of the Instant Pot. Top with the remaining spices from the bowl. Pour the chicken broth over the top, add in the bay leaf, and secure the lid.
Set the valve to Sealing and select Pressure Cook (Normal) and Keep Warm (Off), using the +/– button to set the time to 90 minutes.
The final internal temperature of the pork should reach 145 degrees. When cooking completes, do a Natural Release of the pressure for 25 minutes.
Switch the valve to Venting and allow the remaining pressure (if any) to release. Remove the lid and discard the bone, bay leaf, and any excess visible fat from the inner pot.
Using two large forks, begin to shred the pork directly into the broth and spice mixture. Serve immediately.
For a smaller pork shoulder, adjust the time accordingly with the estimate of 22 minutes per pound.
Serve with cabbage slaw on top of a Hawaiian sweet roll or on its own over a salad for a keto-friendly option.
Switch up your seasonings and add your favorite spice blend! If you’re using barbecue sauce, wait until the final stages of serving to add.
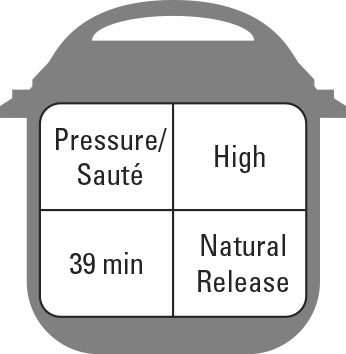
Carne Guisada
Though Carne Guisada is traditionally served with tortillas, to remain keto compliant you can serve it alongside some butterleaf lettuce or spoon it into a halved avocado. Avocados are a nutrient-rich food that helps to provide satiety alongside the better-for-you fats that aren’t found in meats.
Instant Pot function: Pressure Cook (High), Keep Warm (On), Natural Release, Sauté (High)
Fits diets: Gluten-Free, Keto
Prep time: 10 minutes
Cook time: 39 minutes
Yield: 8 servings
Ingredients
3 pounds beef stew meat, cubed
2 cups beef stock
2 tablespoons tomato paste
1 tablespoon dried oregano
1 teaspoon cumin
4 garlic cloves, chopped
1 large onion, chopped
1 large green bell pepper, chopped
1-1/2 teaspoons salt
2 tablespoons cornstarch
2 tablespoons cold water
Directions
Place the cubed stew meat into the Instant Pot and add the beef stock, tomato paste, oregano, cumin, cloves, onion, bell pepper, and salt. Stir to combine the ingredients, and secure the lid.
Press Pressure Cook (High) on the Instant Pot, adjust the time to 35 minutes using the +/– button, with Keep Warm (On). Do a Natural Release of the pressure for 15 minutes.
Using a slotted spoon, remove the meat to a serving bowl.
In a small bowl, whisk together the cornstarch and water.
Press Sauté (High) and, while whisking, add in the cornstarch slurry. Bring the sauce to a low simmer about 4 minutes; then ladle over the meat and serve.
If you prefer a smoother gravy, use an immersion blender or regular blender to blend the gravy before serving. Work in small batches with a towel over the top of the blender. Serve with flour tortillas or over rice, mashed potatoes, or cauliflower rice.
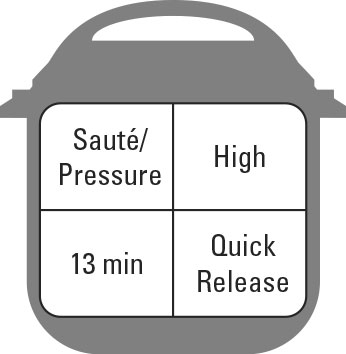
Korean Beef Bulgogi Bowl
Our Korean Beef Bulgogi Bowl recipe does call for sugar, but to remain keto compliant, you can substitute the brown sugar with stevia or monk fruit. This delicious recipe can certainly fit into your low-carb meal plan when paired with a simple cauliflower rice. Cauliflower rice is a freezer-friendly staple, so you won’t have to spend hours in the kitchen ricing your own.
Instant Pot function: Sauté (High), Pressure Cook (High), Keep Warm (Off), Quick Release
Prep time: 5 minutes
Cook time: 13 minutes
Yield: 4 servings
Ingredients
1/3 cup filtered water
1/4 cup low-sodium soy sauce
2 tablespoons rice wine vinegar
2 tablespoons packed brown sugar
2 teaspoons sesame oil
1 teaspoon ground ginger
2 tablespoons cornstarch
1-1/4 pounds lean ground beef
1/2 small onion, chopped
1 teaspoon minced garlic
2 cups chopped bell peppers
2 cups cooked brown rice, divided
2 cups Basic Brown Rice
1 stalk of green onion, chopped, for garnish
1/2 teaspoon red pepper flakes, for garnish
4 teaspoons Sriracha, for garnish
Directions
In a small bowl, whisk together the water, soy sauce, rice wine vinegar, brown sugar, sesame oil, ginger, and cornstarch. Set aside.
Press Sauté (High) on the Instant Pot and add the ground beef. When the beef begins to brown (about 3 minutes), add in the onion, garlic, and bell peppers. Continue to cook for 5 minutes. When finished, press Cancel.
Stir in the sauce and select Pressure Cook (High) and Keep Warm (Off), adjust the timer to 5 minutes using the +/– button, and secure the lid. Ensure the vent is set to Sealing.
When the cooking completes, press Cancel, remove the lid, stir, and portion into 4 bowls, served over 1/2 cup of Brown Jasmine Rice. Garnish as desired with green onion, red pepper flakes, and Sriracha.
To make the recipe keto compliant, substitute a sugar replacement for the brown sugar. Because sugar substitutes are sweeter than sugar, use half the amount. Then serve with cauliflower rice.
Use a tamari sauce in place of soy to make the recipe gluten-free.
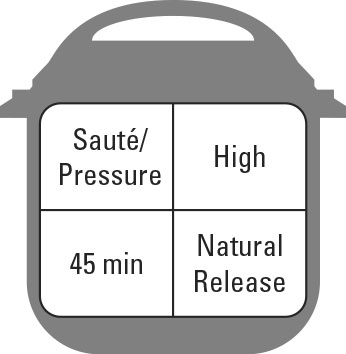
Turkey and Mushroom Meatloaf
Nothing is worse than showing up to an event without something to eat! That’s why our prep-ahead Turkey and Mushroom Meatloaf can be a keto follower’s best friend for a weekend away. Going camping? Cook ahead and modify by using an almond flour in place of the breadcrumbs. Reheat to 165 degrees (yes, you can do this over an open flame in the woods), and you’ll have a nourishing meal (not out of a package) in a matter of minutes.
Instant Pot function: Sauté (High), Pressure Cook (High), Keep Warm (Off), Natural Release
Special tools: Three 4-inch loaf pans
Fits diets: Gluten-Free, Keto, Mediterranean
Prep time: 10 minutes
Cook time: 45 minutes
Yield: 6 servings
Ingredients
1 teaspoon extra-virgin olive oil
1/4 small onion, chopped
1 teaspoon minced garlic
3 large white mushrooms, finely diced
1 pound lean ground turkey
1 large egg
1 teaspoon Italian seasoning
1/2 teaspoon ground black pepper
1/8 teaspoon salt
1 tablespoon fresh chopped basil
1/2 cup whole-wheat breadcrumbs
6 tablespoons barbecue sauce
1 cup water
Directions
Press Sauté (High) on the Instant Pot, and place the oil in the inner pot. Add the onion, garlic, and mushrooms. Sauté for 10 minutes, until the mushrooms are tender. Press Cancel.
In a large bowl, combine the mushroom mixture with the ground turkey. Add in the egg, Italian seasoning, pepper, salt, basil, and breadcrumbs. Mix until uniformly combined. Liberally spray three 4-inch aluminum loaf pans with cooking spray. Divide the turkey mixture evenly into the loaf pans and top each loaf with 2 tablespoons of barbecue sauce.
Cover the loaf pans with aluminum foil. Rinse the inner pot and dry the outside. Place the insert back into the Instant Pot, and pour the water in. Position the metal trivet on the bottom and place 2 loaf pans on top; place the remaining loaf pan horizontally across the bottom pans. Close the lid and set to Sealing.
Press Pressure Cook (High) and Keep Warm (Off), and use the +/– button to set the timer to 35 minutes. When cooking completes, do a Natural Release of the pressure for 5 minutes, and then use Quick Release to remove the remaining pressure.
Remove the foil from the loaf pans, slice and serve.
These make an excellent freezer-friendly meal to enjoy later. Just reheat until the internal temperature of the meatloaf is 165 degrees.
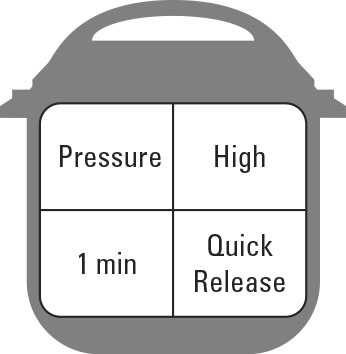
Garlic Green Beans and Tomatoes
Green beans are non-starchy vegetables (along with artichokes, bok choy, cabbage, celery, mushrooms, and spinach — think of vegetables that grow aboveground.) Though tomatoes are a bit higher in carbohydrates, when eaten in moderation, they can absolutely fit into a keto diet! Pair our Garlic Green Beans and Tomatoes recipe with any meat, and we promise, you’ll be satiated and satisfied!
Instant Pot function: Pressure Cook (High), Keep Warm (On), Quick Release
Fits diets: Gluten-Free, Mediterranean, Vegan, Vegetarian
Prep time: 5 minutes
Cook time: 1 minute
Yield: 6 servings
Ingredients
1/2 cup water
1 pound fresh green beans, ends removed
2 cloves garlic, minced
1 lemon, zested and juiced
1/4 cup extra-virgin olive oil
1/2 teaspoon salt
1/4 teaspoon pepper
1/8 teaspoon onion powder
1 small red onion, thinly sliced
1 cup halved cherry tomatoes
Directions
Place the water into the inner pot of the Instant Pot. Add the green beans. Cover with the lid, set the valve to Sealing, and press Pressure Cook (High) and Keep Warm (Off). Adjust the time to 0 minutes using the +/– button.
Meanwhile, in a small bowl, whisk together the garlic, lemon zest, lemon juice, olive oil, salt, pepper, and onion powder.
When the cooking completes, do a Quick Release, and immediately place the green beans in an ice bath for 1 minute. (This helps retain the bright green color and halts the cooking process.)
In a serving bowl, toss the green beans, red onions, and cherry tomatoes together. Drizzle with the dressing, toss, and serve.
Use fresh asparagus instead of green beans for a seasonal twist.

1
Cheese Fondue with Jalapeños
Our Cheese Fondue with Jalapeños is a party-friendly appetizer that you and your friends on the keto bandwagon can enjoy! Serve this recipe alongside celery sticks, cauliflower, radishes, or even rolled meats. Remember, though: This is a pretty high-sodium dish, so be mindful of your portions and drink lots of water.
Instant Pot function: Pressure Cook (High), Keep Warm (Off), Quick Release
Special tools: Instant Pot–friendly casserole dish
Fits diets: Gluten-Free, Keto, Vegetarian
Prep time: 5 minutes
Cook time: 10 minutes
Yield: 8 servings
Ingredients
One 12-ounce can cheese soup
1/2 cup plain Greek yogurt
8 ounces shredded reduced-fat cheddar cheese
One 8-ounce canned diced jalapeño
1/2 teaspoon garlic powder
1 tablespoon yellow mustard
1/2 teaspoon paprika
1/4 teaspoon ground black pepper
1/4 teaspoon salt
1-1/2 cups water
1/4 cup chopped parsley, for garnish
Crusty bread, for serving
Tortilla chips, for serving
Directions
In a medium bowl, mix the cheese soup, yogurt, cheddar cheese, jalapeño, garlic powder, yellow mustard, paprika, pepper, and salt. Pour into an Instant Pot–friendly casserole dish and cover tightly with foil.
Press Pressure Cook (High) and Keep Warm (Off), and set the timer for 10 minutes using the +/– button.
Add the water to the base of the metal pot insert and place the metal trivet over the water. Position the pan on top of the trivet and secure the lid. Set the valve to Sealing.
When the cooking completes, press Cancel. Use Quick Release to remove the pressure.
Carefully remove the pan from the Instant Pot and discard the foil. Stir the cheese fondue one more time, and garnish with parsley.
Serve with crusty bread or tortilla chips, or use as a topping for tacos, nachos, or burgers.
If you prefer less-spicy foods, you can omit the jalapeños.
1
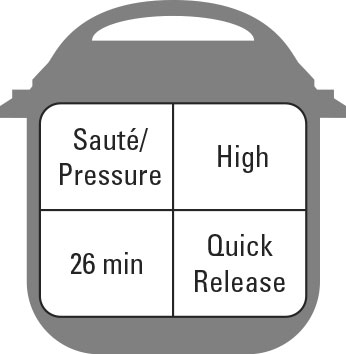
Spiced Walnuts and Cashews
Need to satisfy a sweet tooth but recognize that keto means saying no to your favorite desserts? Then our Spiced Walnuts and Cashews recipe is a great go-to. Walnuts are rich in omega-3 fatty acids, a heart-healthy fat that has shown to have many promising effects within the body. When preparing this recipe, you can swap the maple with commonly approved sugar substitutes on the keto diet, like stevia, monk fruit, erythritol, or xylitol.
A word of caution, though: If you’re new to sugar substitutes, be mindful of portions and see how your body responds. Some people report tummy troubles upon eating sugar substitutes.
Instant Pot function: Sauté (High), Pressure Cook (High), Keep Warm (Off), Quick Release
Fits diets: Gluten-Free, Keto, Mediterranean, Vegan, Vegetarian
Prep time: None
Tempo di cottura : 26 minuti
Resa: 12 porzioni
ingredienti
1/4 tazza di sciroppo d'acero puro
1 cucchiaino di estratto di vaniglia
1 cucchiaino di cannella in polvere
1 cucchiaino di curcuma macinata
1/2 cucchiaino di noce moscata macinata
1/4 di cucchiaino di pepe di Caienna
2 tazze di noci a metà, crude
1 tazza di anacardi, crudi
1/3 di tazza d'acqua
1/2 tazza di mirtilli rossi secchi
2 cucchiai di semi di sesamo
1/2 cucchiaino di sale
Indicazioni
Premi Sauté (alto) sulla pentola istantanea. Nella pentola di metallo, aggiungi lo sciroppo d'acero, la vaniglia, la cannella, la curcuma, la noce moscata e il pepe. Mescolare e aggiungere lentamente le noci e gli anacardi e cuocere per circa 4 minuti.
Premi Annulla . Aggiungere l'acqua, mescolare e chiudere il coperchio. Impostare la valvola su Sealing, premere Pressure Cook (High ) e Keep Warm (Off) e impostare il timer su 8 minuti utilizzando il pulsante +/–. Nel frattempo preriscaldare il forno a 300 gradi.
Al termine della cottura, premere Annulla e utilizzare il rilascio rapido per rimuovere la pressione.
Foderare una teglia bordata con carta da forno e spruzzare con spray da cucina. Aggiungere i mirtilli rossi, i semi di sesamo e il sale nella pentola e unire alle noci.
Distribuire il composto di noci sulla teglia. Mettere in forno e cuocere per 8 minuti, mescolare e poi cuocere i restanti 6 minuti. Togliete dal forno e lasciate raffreddare per 10 minuti. Servire.
Per rendere questa ricetta conforme al keto, usa da 2 a 3 gocce di frutto del monaco o estratto di stevia al posto dello sciroppo d'acero puro.
Acquista le noci crude dai contenitori sfusi e conservale nel congelatore per una freschezza ottimale.
Usa mandorle e noci pecan per le noci e sostituisci i pezzi di mango essiccato con i mirtilli rossi.
Scopri la struttura chimica dei carboidrati, dai monosaccaridi ai polisaccaridi. Analisi approfondita dei benefici nutrizionali e del ruolo nella dieta moderna.
Scopri l
Cerchi una bevanda per tenerti al caldo durante la lunga stagione invernale? Questa <strong>cioccolata calda alcolica</strong> è ideale per le notti fredde. Scopri la ricetta!
Scopri la ricetta del Risotto al vino bianco, un piatto vegetariano ricco di sapori con ingredienti freschi e vino di qualità, perfetto per ogni occasione.
Scopri come tagliare a cubetti una melanzana facilmente per le tue ricette, come zuppe e salse. Segui i nostri semplici passaggi per ottenere il miglior risultato!
Scopri la ricetta delle Patate Scaloppate, un classico comfort food cremoso e ricco di sapore. Ottimo accompagnamento per carne e pollame.
Scopri come il cibo cinese può essere adattato per una dieta a misura di diabetici, con piatti ricchi di verdure e proteine sane.
Scopri come tagliare le verdure a julienne e a cubetti con la nostra guida dettagliata, piena di suggerimenti utili e tecniche professionali.
La Francia produce più vino di qualsiasi altro paese, tranne quando lo fa l
La regione francese di Bordeaux produce alcuni dei migliori vini bianchi del mondo, oltre ai più comunemente noti vini rossi di Bordeaux. I migliori vini bianchi secchi di Bordeaux sono unici nella regione di Bordeaux; in nessun'altra parte del mondo si possono trovare vini del genere. Come per molti vini pregiati, tuttavia, la loro produzione è […]


")